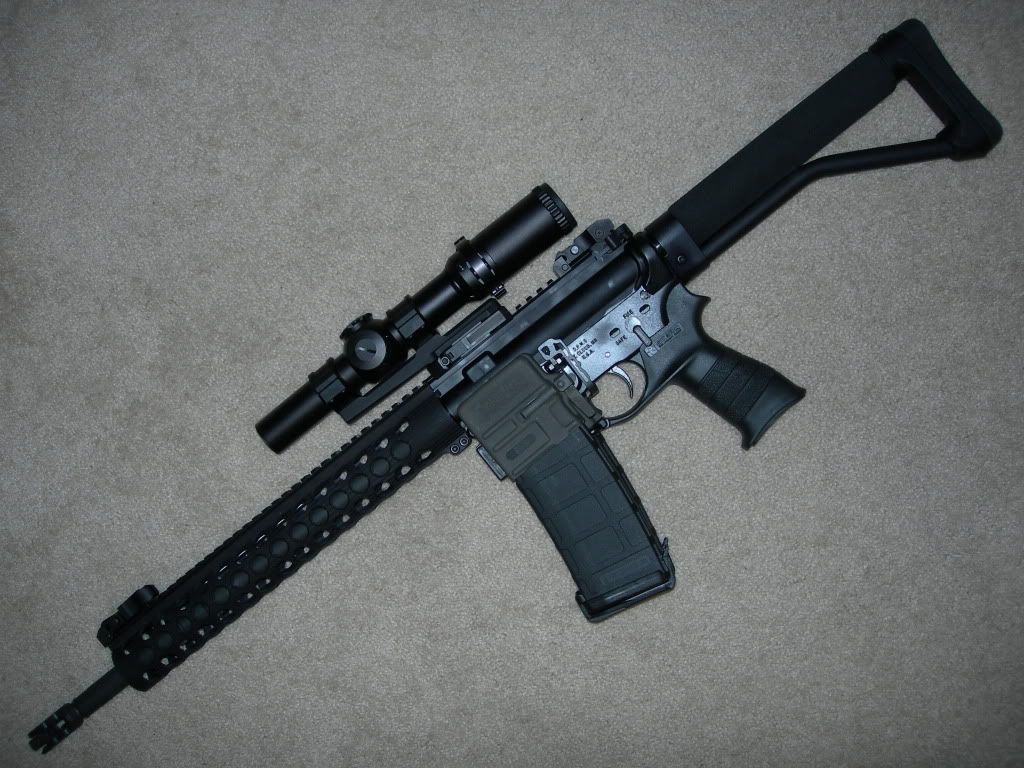
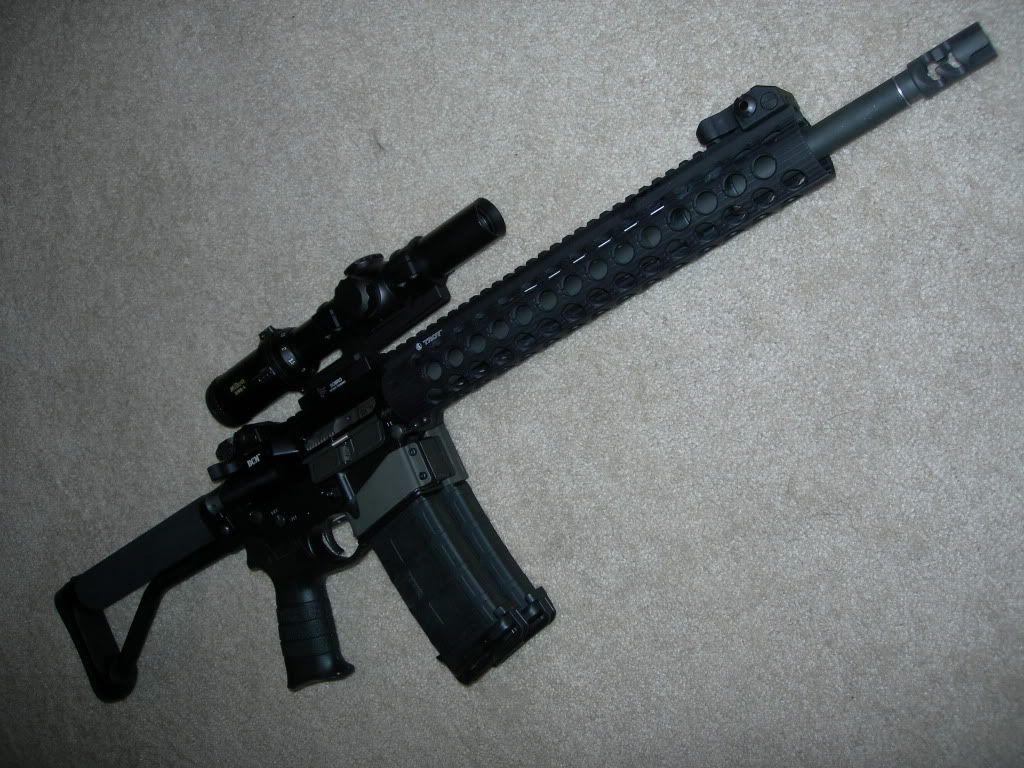
A full bag of tricks, my OCD build.

This build has been a few months in the making due to my deployment schedule, and waiting on parts. I put the upper together some time ago, and have run about 500 rds of .223 and 500 rds of .22 through it so far while it was sitting on my old lower. Along the way some plans changed, I ditched the ACE ARFX stock for a UBR which I dig. but the basic rifle followed my origional plan pretty well. I just finished the lower, so still waiting to test out all the mods I did to the LPK, but I have no worries. Only piece I’m missing is a Magpul RSA for the front attachment point of my sling. This rifle is a far cry from my first AR which was built on a strict budget.

Enough of that crap, on to the build.

Here’s the parts so far.

BCM Mid length chrome lined upper
BCM BCG
BCM Gunfighter charging handle Mod4
Troy TRX Extreme 13" full floater tube
Troy HK style folding front sight
Troy Folding rear sight
Stark grip
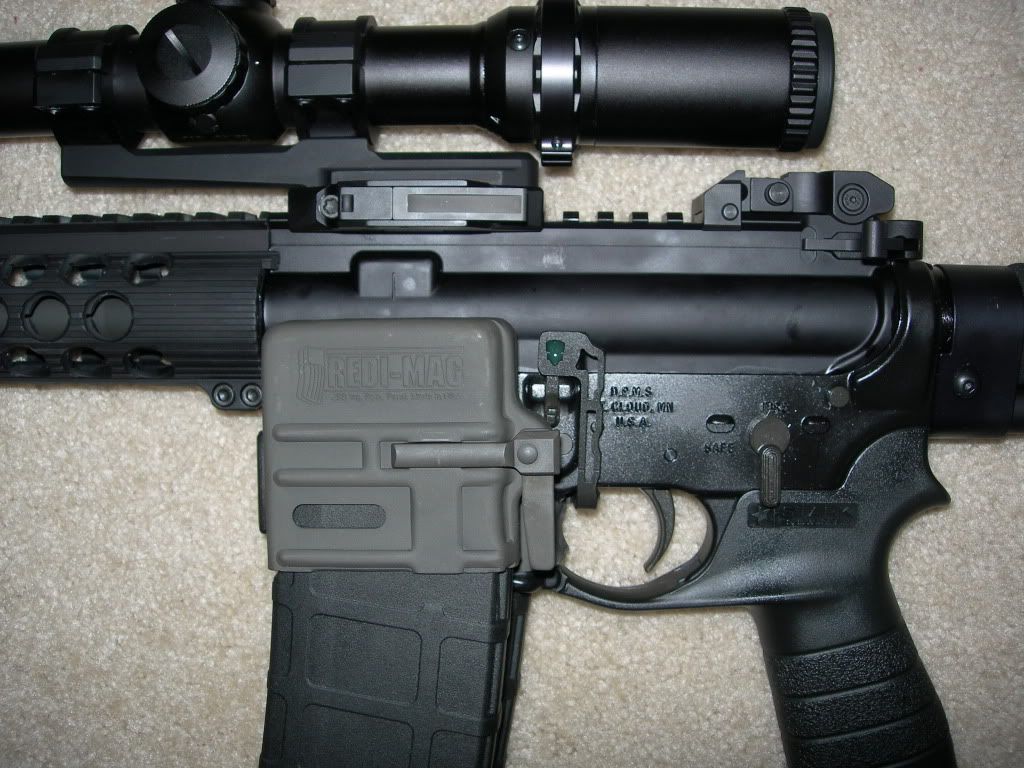
Boonie packer Redi-Mag
PWS FSC556 muzzle brake/flash hider

First order of buisness was to take things apart. Lots of folks seem to have trouble removing the taper pins from the front sight block. If you’ve ever tried it, you know they like being where they are and can be a bit stubborn to remove. For some reason folks think that you need to use the proper size punch to remove them, this is what actually leads to problems. Forget using a 1/8" punch, grab a big ole flat tipped punch to get things started. I used a 5/16" punch. There will be at least a nubbin of the taper pin showing on the small side, smack that sucker with at least a 24oz ballpeen hammer to get it started. Here’s the punches I used, big one to start it moving, small one to get it outa there.

And here it is all broken down. Keep in mind, this is all brand new stuff, the upper hasn’t even been put on a lower yet. Notice the front sight block, that’s a future project.

Before we get to the front sight block though, it’s time to true up the upper reciever. This is going to make the barrel mounting surface perfectly flat and true to the inner bore of the upper reciever. The jury is still out on taking the time to do this, but I figure it can’t hurt, so why not take the time to do it? Supposedly it will help with accuracy, but I see the main benefit as prolonging the life of your bolt. How so you ask? Well, if the bolt is not running true to the barrel extension, then stress is not being applied evenly to the locking lugs. Since locking lug cracks are one downfall of high round count AR’s, everything you can do to make life easier for your bolt is a good thing. Having pressure applied evenly to the barrel mounting flange can’t hurt either.

Here’s the lapping tool inserted in the reciever and loaded up with lapping compound, I used 800 grit.

The tool is a VERY tight fit in the reciever to index it, a thin lube should be doused in there so there is not damage to the interior of the upper reciever. Slide it in place, lube it up, load the flange with lapping compound, and spin that sucker with your drill of choice using light pressure and medium speed.

Here’s a pic part way through. I got a bit carried away and should have stopped earlier to take a pic to show the surface partway through better. As it is, you can see that the silver ring is uneven in its width, there was actually annodizing left from 7 oclock to 1 oclock when this pic was taken, it’s just hard to get a good pick of the shading.

Here it is upon completion, notice the shiney ring is even all the way around, the barrel mounting surface is now perfectly flat and true to the bore of the upper reciever.

Next up is fixing that front sight block. Since I’m installing a rifle length floater tube on a 16" barrel, the FSB needs to be cut down to fit under it. So here is the new low profile gas block. Remember this was a standard AR front sight when I started, not bad for only using a 4.5" angle grinder if I do say so myself.

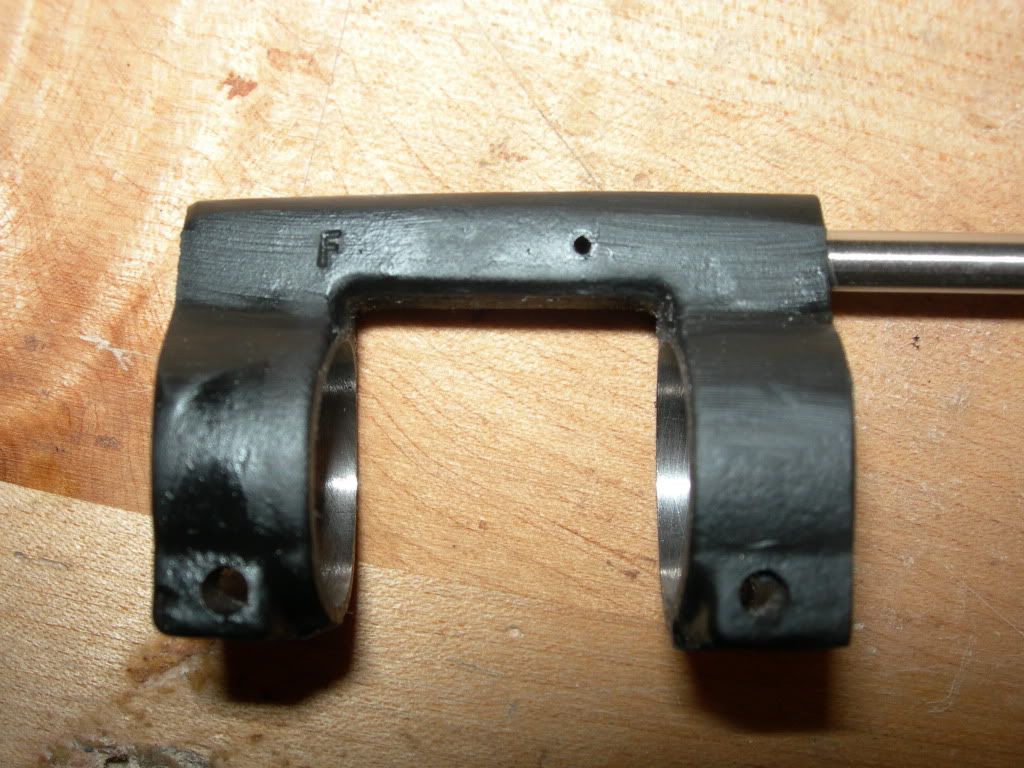
No pics of installing the barrel in the upper, not much to take pics of. Used a little moly grease, torqued it to 40 lbs, then tightened it enough to line up the gas tube. It took a lil bit as I made sure the gas tube was perfectly centered in the 4 leaf clover opening in the upper, but I got it. Next was reinstalling the gas block.

Pins in to make sure it was in the right spot.

Then drive em home, dont be scared, give em a goon thrashing with a punch and ballpeen.

Next up was installing the Troy full floater tube. Piece of cake to install. Slide it over the barrel nut, rotate it just a touch to line it up with the reciever rail, and tighten two screws. Overall, I dig the feel of the rail, it’s light as all git out, has a nice thin profile, and is grippy. I am a bit dissapointed by a couple things though. First is the top rail is just a fuzz taller than the rail on the reciever.

The second is the stop block that is supposed to index the top rail to the reciever. To get the rail perfectly aligned with the reciever, the stop block is not touching the reciever, I had to back off of it just a touch to get perfect alignment.

Next up was throwing the flip up sights on there, complete nobrainer, just put them in place and tighten. I’m looking forward to trying out the HK style front sight, the theory is the curved sides of the sight will act as a circle in a circle sight picture for close up quick shots.

You can also see the PWS FSC556 muzzle brake. This took a bit to time correctly, it comes with a shim pack with 3 different thicknesses of shims. The large will account for approximatly 180* of rotation, the middle is good for 45* of rotation, and the smallest is about 20* of rotation. Mix and match until the top of the brake is where it needs to be, it takes some trial and error.

Rear sight is standard Troy BUIS. While I was tempted to try out a standard Troy front sight and their new diamond rear sight, I just couldn’t make that leap, I’ll let others be the guinnea pigs for that one.

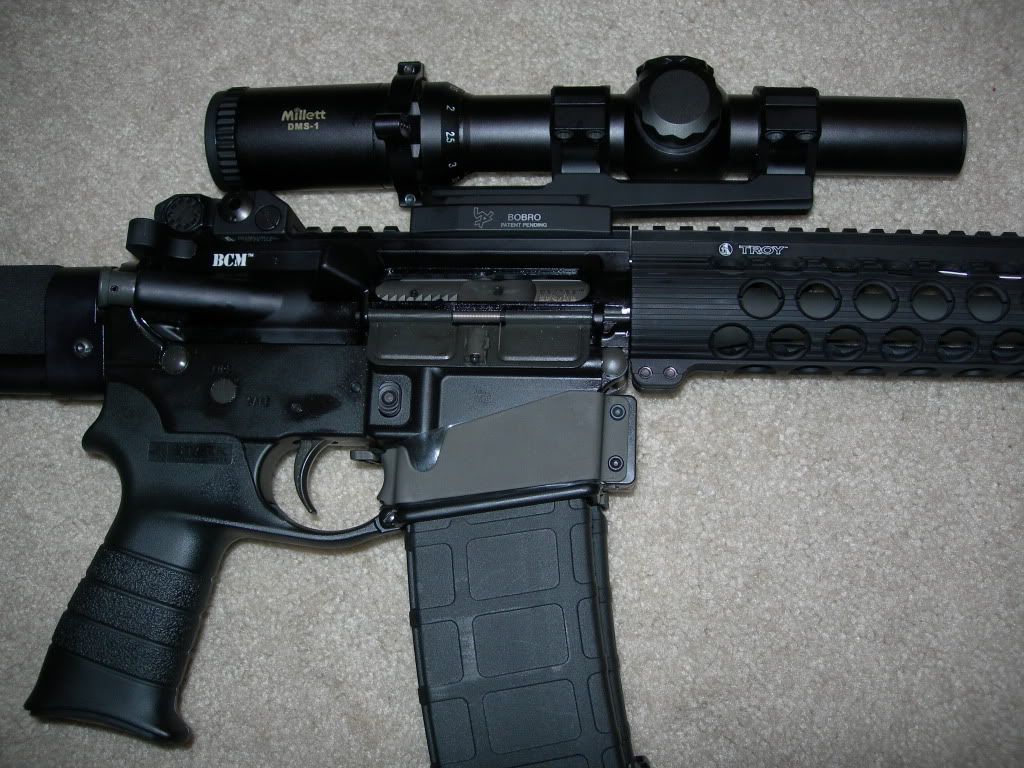
Since I don’t have a new lower reciever or lower parts kit yet, I threw it on my current lower after installing the Redi-mag and Stark grip just to see how it was going to feel. The lower is a DPMS, with a DPMS lower parts kit, ACE ARFX stock, Phase 5 Tactical extended bolt release, and a bit of trigger polishing by your’s truely. Add in the Millet DMS-1 scope with throw lever, and a Bobro mount just for shits and grins.


That’s about it for the time being, next episode will be a new lower with trigger work, captured detents, and putting that Redi-mag on a serious diet via a drill press and dremmel tool.

Finally time to finish this thing up.

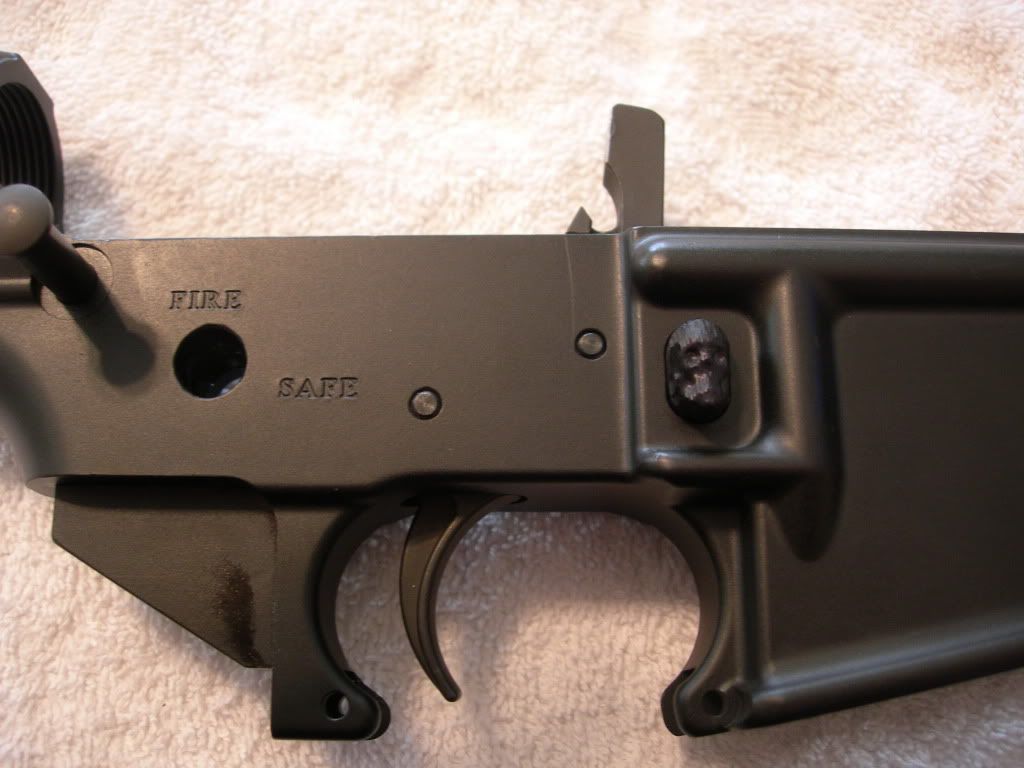
Got a CMMG lower from Pete at evilblackrifles.com, told him I wanted a lower, didn’t care what brand, but it had to have the deepest darkest black finish to match my BCM upper, and it had to drop 1st gen P-mags free. He went through his stock, picked me out one and sent it on its way.

First step of any project, lay out all your parts to make sure everything is there. Good thing I did, can you spot what is missing in this pic?

Once again, Pete to the rescue, he was gracious enough to throw in the missing parts free of charge with another order I had placed. Now that’s service, sending me free replacement parts for a LPK that I didn’t even order from him. No I won’t be making the mistake of ordering from someone else again, Pete’s the man.

On to the install, but first some mods, starting with a little thread tapping.

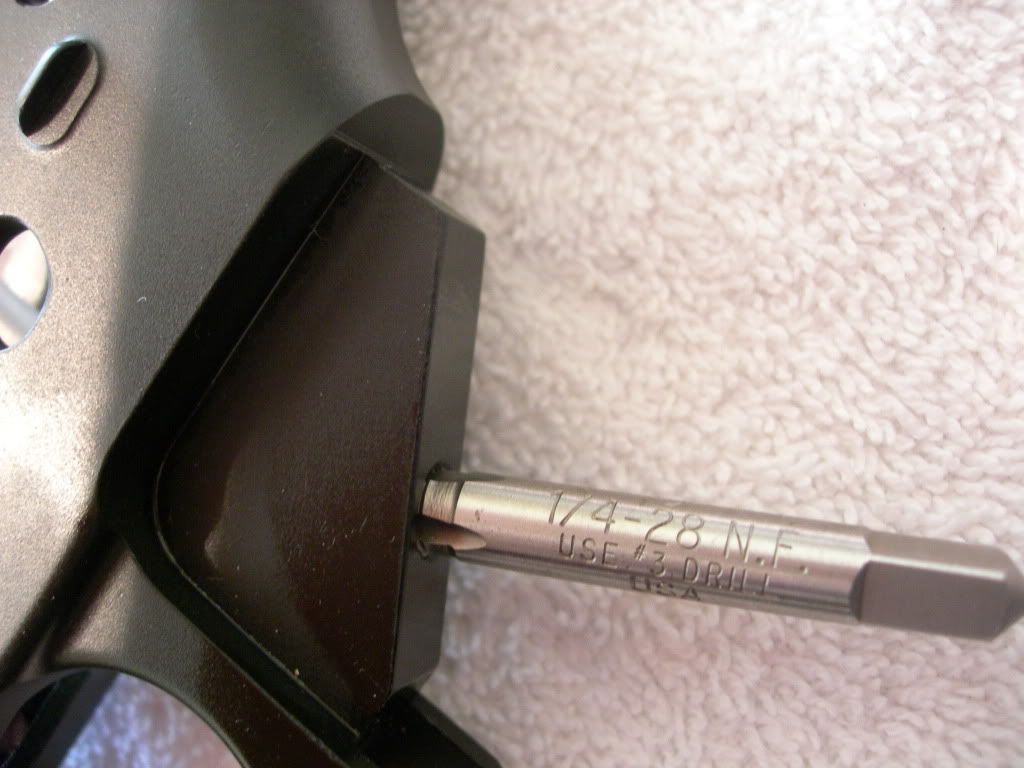
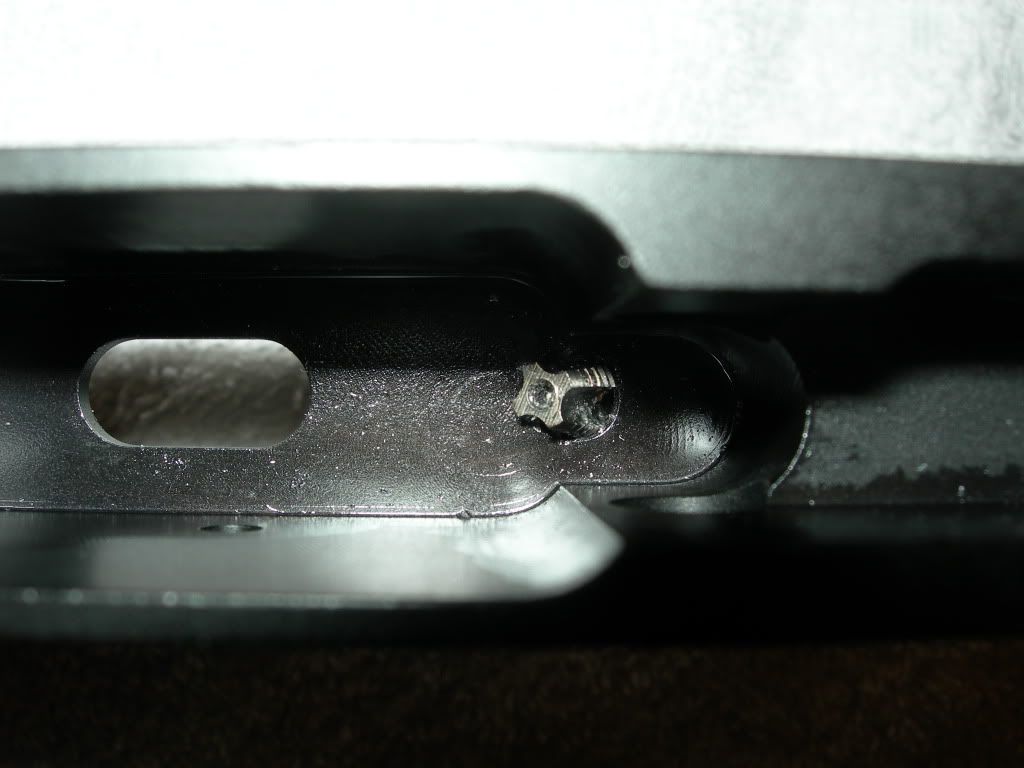
First the rear take down detent bore.

Then the bore for the grip screw, have to have threads going all the way through for what I’m doing, few if any lowers that I’ve heard of are tapped all the way through.

After the lower has been tuned, it’s time to start messing with some internal parts.

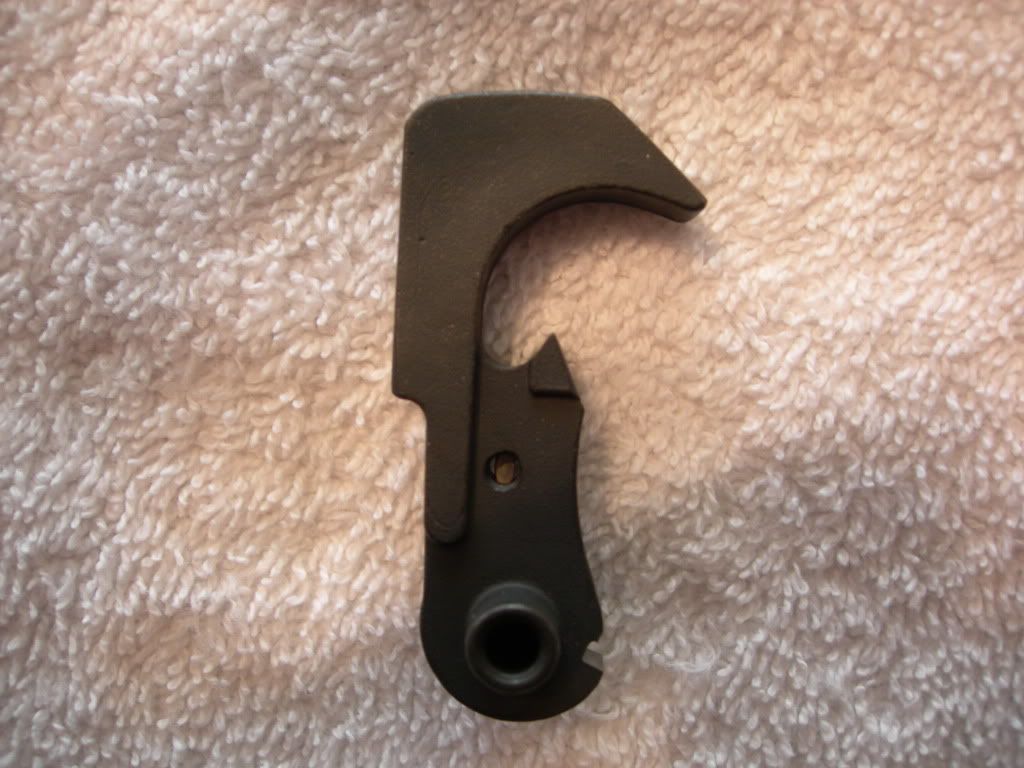
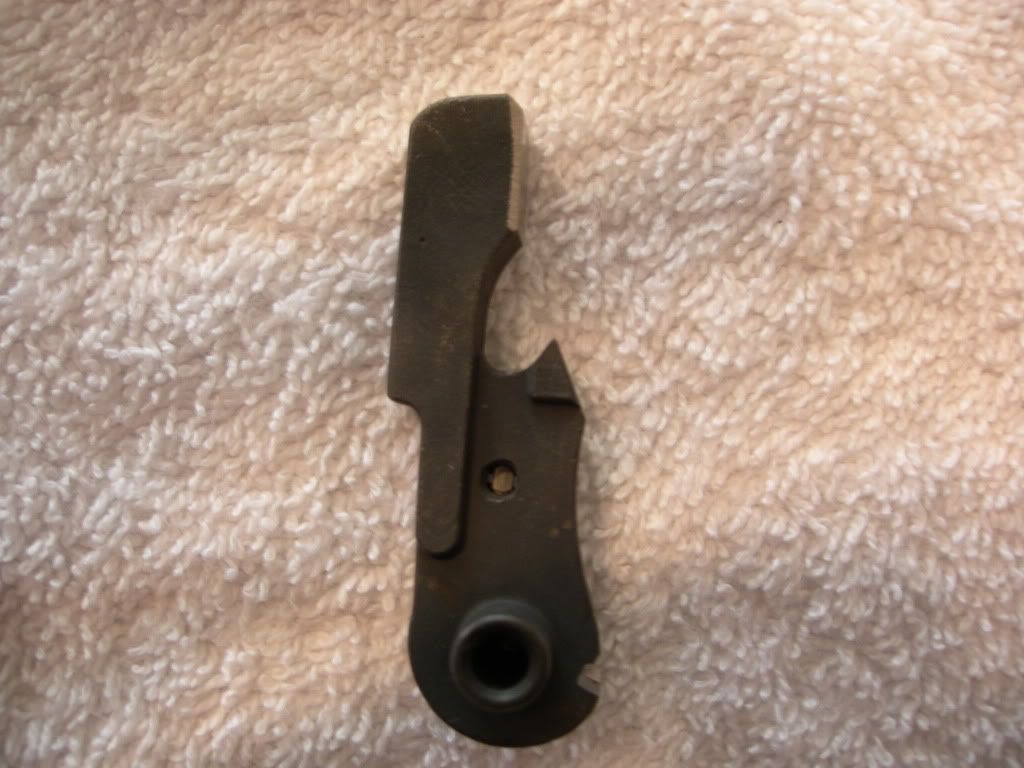
First up is the hammer.

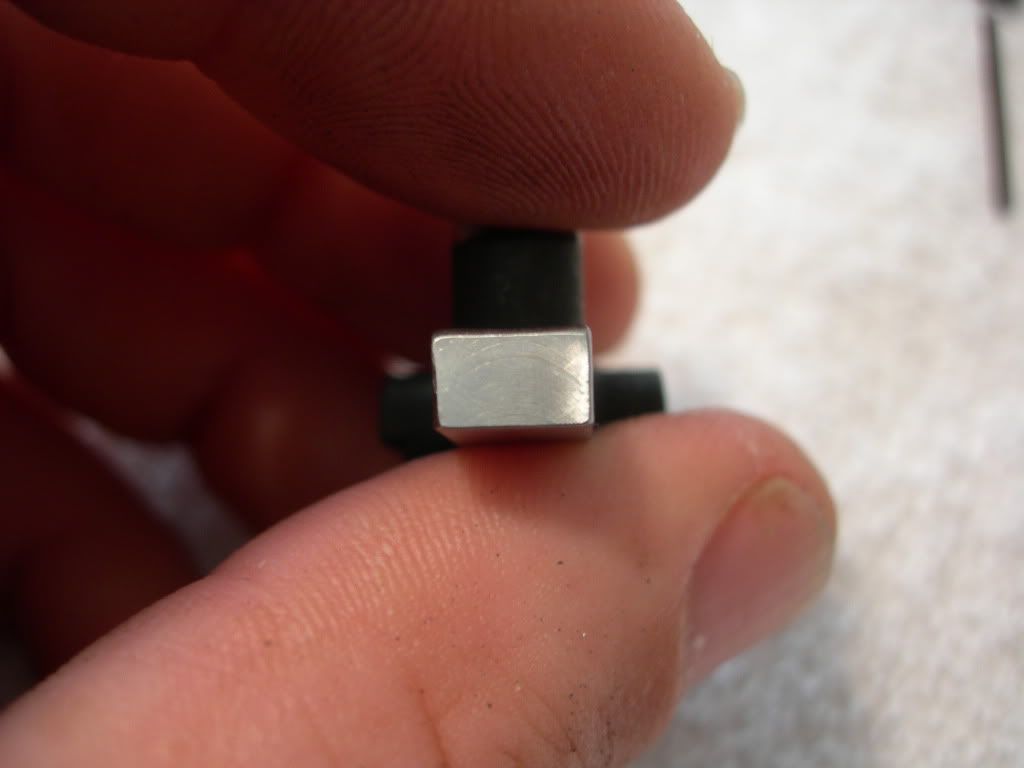
Before.

After.

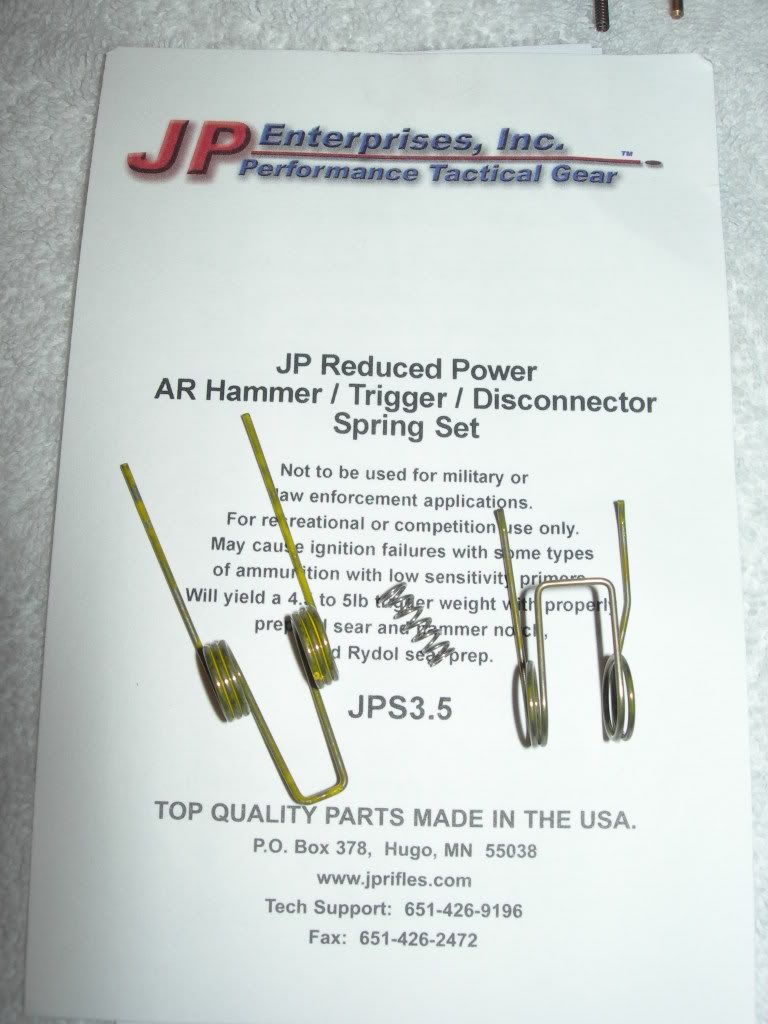
Why? Lighter hammer will move faster, an object at rest stays at rest… it takes less force to accelerate. Should work perfectly with the JP lightweight springs I’m using.

With a full weight hammer, the light weight springs may not get it to it’s max velocity making for light strikes, hopefully this mod will prevent that, I’ll report back after a few range trips.

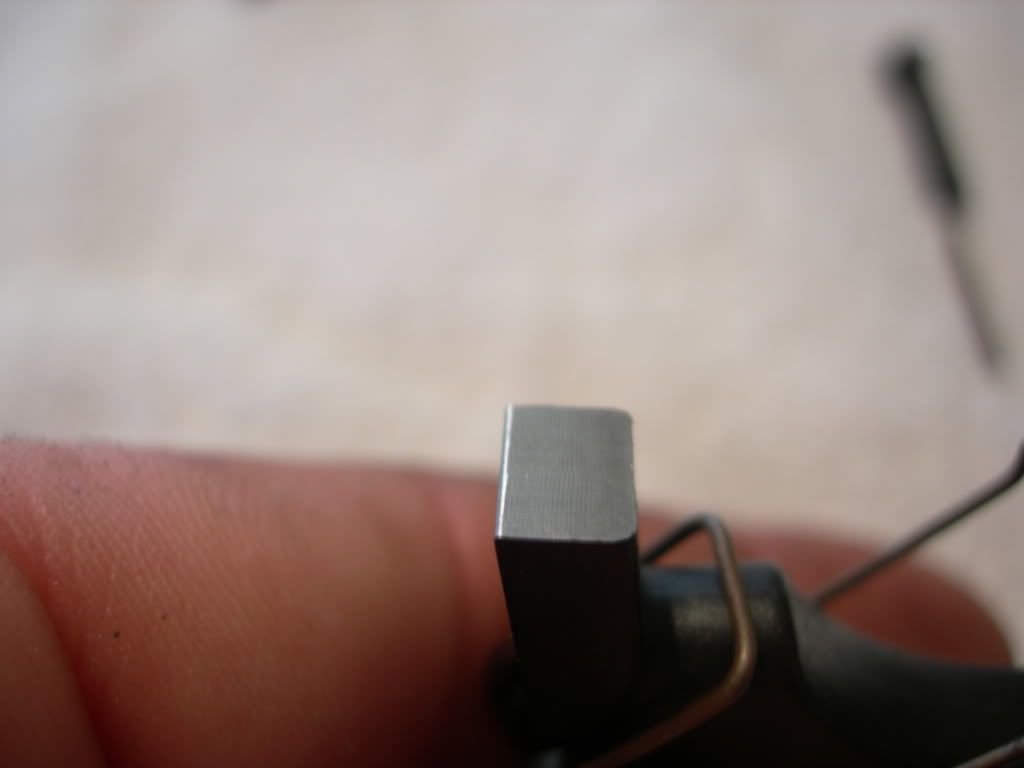
Next up is the trigger, have to smooth that sucker out a bit before even giving it a try. Smoothing the trigger is pretty simple and yielded fantastic results on my other AR, so I have no doubt about the value of taking the time to do it on this one.

Before shot of the sear surface of the trigger.

After.

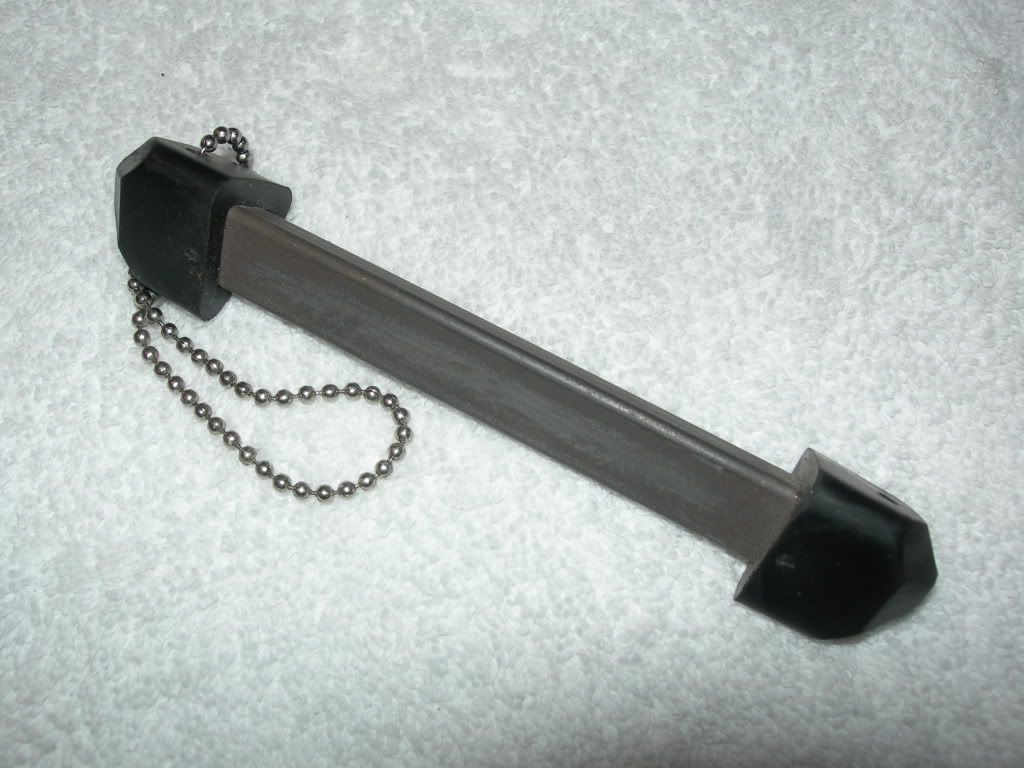
My tool of choice for this, a ceramic knife sharpening stone that I’ve had for years. It’s a very fine cut and nice and flat, perfect for this.

Final polishing and smoothing job, the rear of the bolt carrier. Why the hell would someone polish the rear of the bolt carrier? Simple, to smooth out any rough edges left from when it was machined so it doesn’t chew into the aluminum body of the buffer.

Before shot.

After. I could probably go a bit more on this one, it feels pretty smooth, but still has some machining ridges in it. I need a new sharpening stone since my large one isn’t flat anymore (it’s seen a bit of use), so I had to use a small stone. I’ll touch it up later, but so far it’s an improvement.

Here’s what we’re trying to avoid. This buffer is pretty new, so the groove around the perimiter of it isn’t that bad, I’ve seen much worse. The divots in the center are from a .22 conversion, yes I’ll be filing that weld before I use it again.

That’s about it for the fine tuning, time to start putting all the pieces together. Breaking up the posts due to the pic limits.

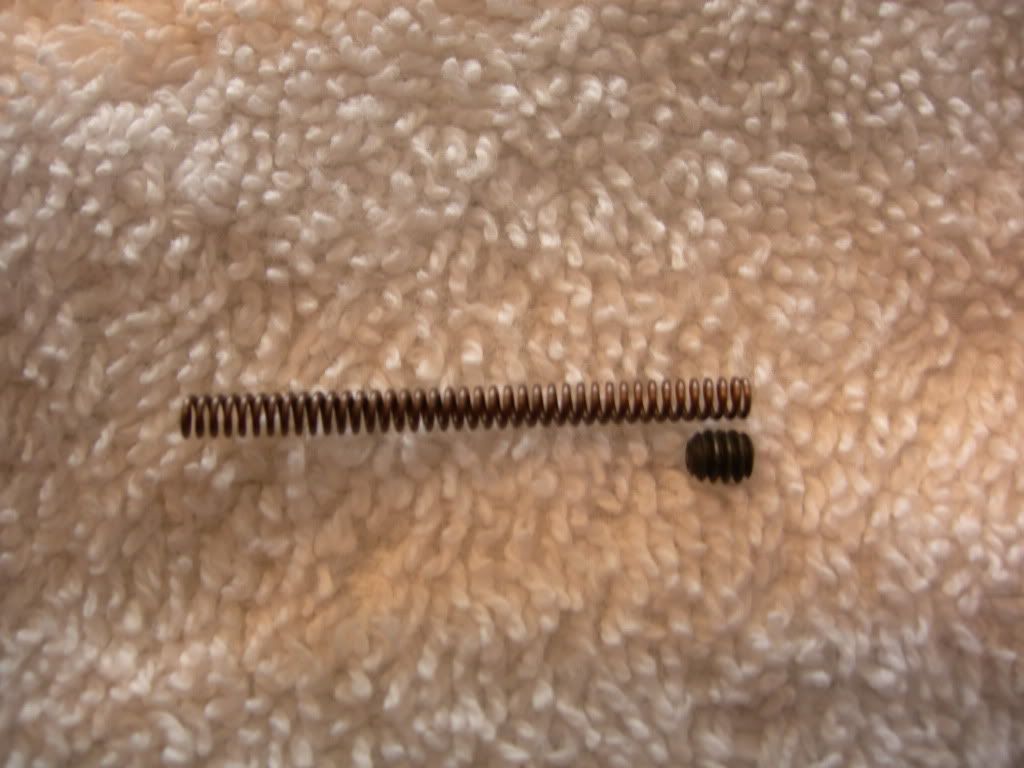
First up is shortening the spring for the rear take down pin detent. Yes, those threads I tapped in the reciever will allow for a set screw to be installed capturing the detent spring. Next time I take the stock off, I won’t have to worry about losing anything.

Spring next to the set screw to gauge how much to remove.

Some snips make quick work of it. As you can tell from the removed bit of spring I went on the conservative side of things, then test fit to make sure it was the way I wanted it to feel.

Took off another half coil, then some locktite.

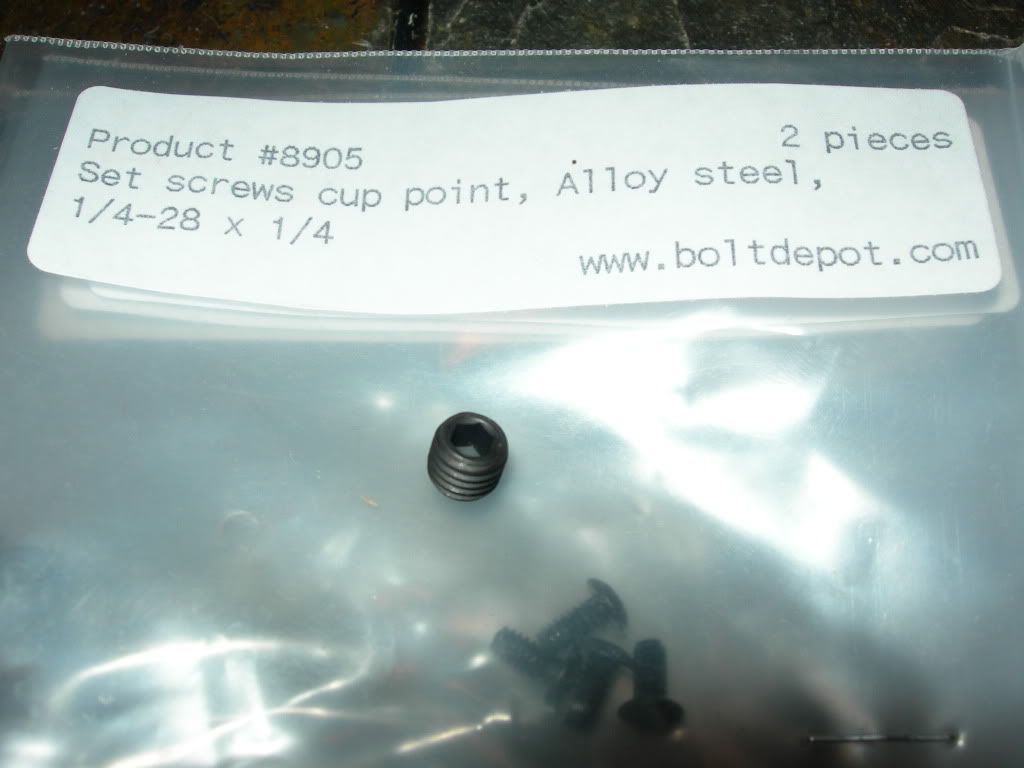
A 4-40 x 1/8" setscrew holds it all together.

Stop when it’s flush with the rear of the reciever.

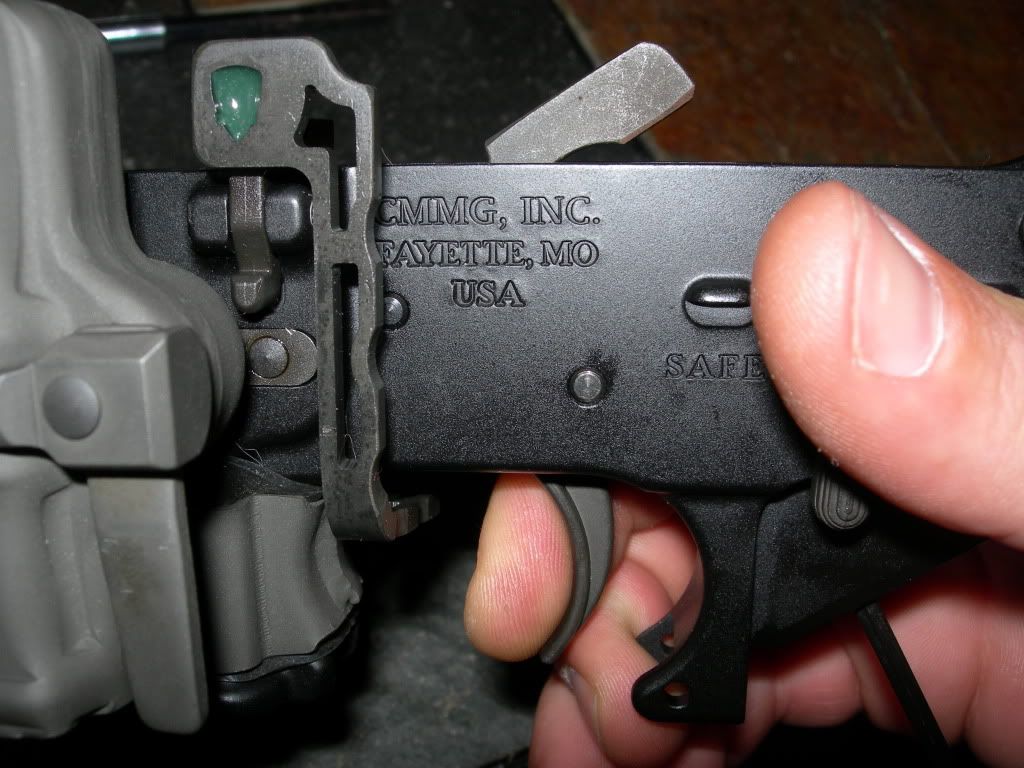
I’m not going to rehash installing the rest of the lower parts kit, except for showing how I prefer to install the forward takedown pin detent. Single edge razor blade works every time, haven’t launched one yet.

Now for those threads in the grip screw bore, yes there is a reason…

A huge thanks to Seabass (12voltguy.com), he hooked me up with some small hardware that I was having a hard time finding locally. When I asked him how much I should send him for the screws he said don’t worry about it. Awesome guy, can’t thank him enough for his generosity.

Here’s the first use of the stuff he sent me.

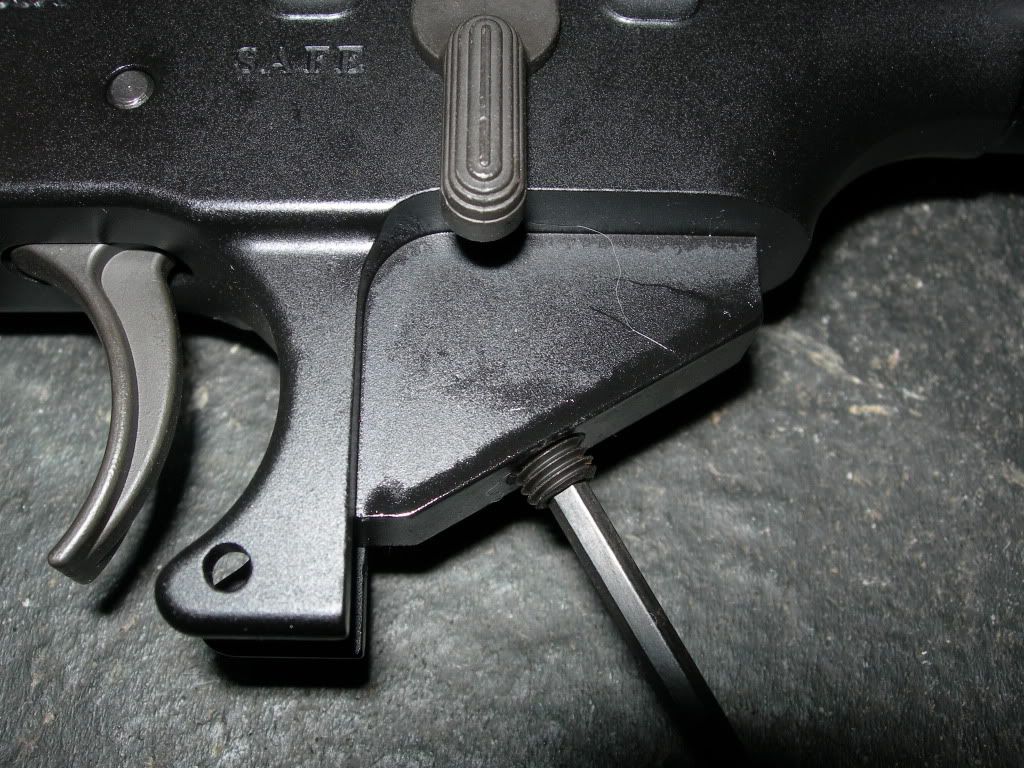
Run the set screw up the bore for the grip screw. Use some blue locktite on the set screw, you do NOT want the set screw to start moving around while you are shooting and mucking up the works.

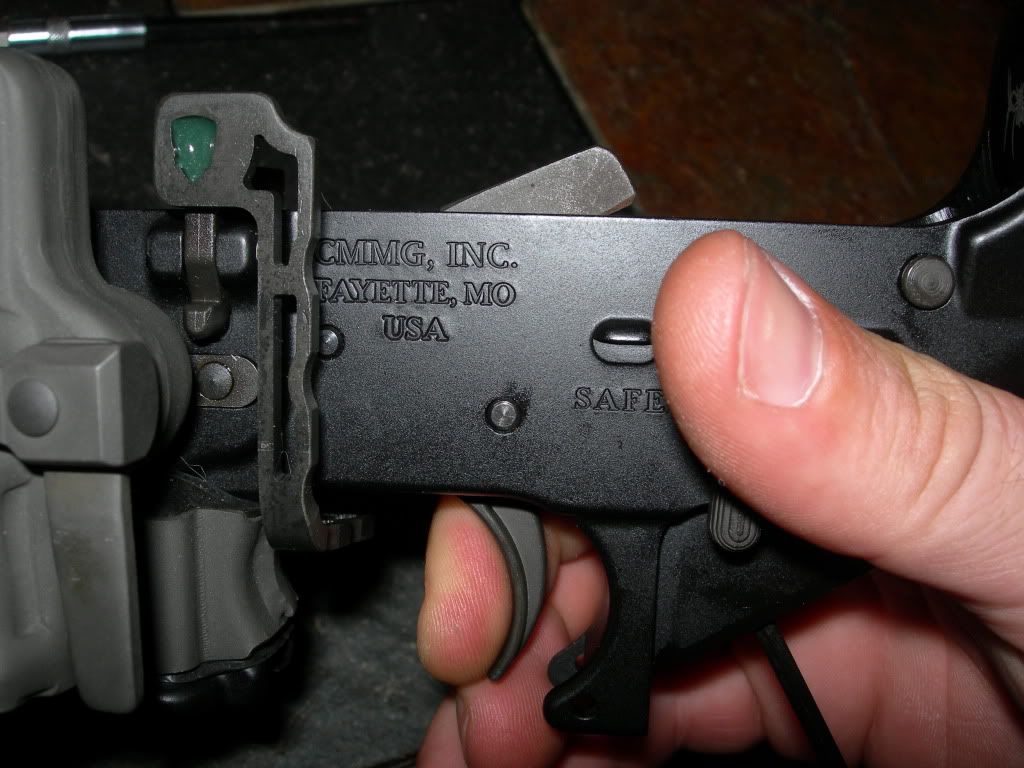
Hold the trigger to the rear and cock the hammer so that it is captured by the disconnector. Then advance the set screw.

Then back out the set screw till the hammer falls from the disconnector to the sear.

Then you can install your pistol grip, don’t forget the safety detent and spring.

Starting to come together.

Yes, that is a zombie skull mag release button, this is the OCD Bling build, so it had to have a little bling in there.

Now for some more goodies going into this build.

First is the Spikes ST-T2 buffer. It’s a touch heavier than an H2 buffer, but it’s filled with tungsten powder instead of individual weights, supposed to be a smoother recoil impulse sort of like a dead blow hammer, have to wait till after a couple range visits for a report on it.

Next up is one of my favorite AR accessories, an extended bolt release lever. I’m waiting on a box from Phase 5 tactical at the moment, he’s sending me some new stuff to try out and review.


That about brings this build to a close, all that’s left is some testing to make sure everything runs 100% with any ammo I can find to feed it.

What started out as needing a replacement rear sight for my first AR somehow morphed into building a complete new one, as well as getting a new Troy rear sight for the first one. Funny how that works aint it?

The finished pair.

Just for kicks, here’s a shot with not one but two 30 round P-mags equipped with Nordic P-mag extensions which add 18 rounds of capacity. Yup, 96 rounds on the gun, who needs a Beta mag?

Fire away with comments, concerns, thoughts, etc, I’ll be glad to talk about the choices I made and why I did what I did.

Range report to follow, I just don’t know when, I might very well end up responding to that drill platform that exploded, still on standby for now.

could you tell me what the set screw in the grip bore is for. I don’t mean to seem stupid just new.

thanks

The set screw in the grip takes out trigger pretravel, so when you squeeze the trigger you aren’t taking up as much slack before the shot breaks.

Have to wait on a range trip for final opinions, but in dryfiring, this trigger feels fantastic.

In case anyone asks, I did bang everything around trying to get the hammer to drop unintentionally, with no joy. I was smacking the but stock on the ground hard enough that I could feel the buffer bouncing back and forth in the tube, and the hammer never fell.

thanks that is kinda what I thought.

That was a very good read. I would be interested to see a follow up report after a couple hundred rounds. Nice work.

Very informative reading…Looking forward to a follow up after range sessions.

Thanks guys.

I can do some partial reviews since I did run the new upper on my old lower for a bit, and have used some of the parts on my other rifle.

BCM 16" mid length 1:7 CL upper and BCM BCG: Flawless. First range trip with this upper on my old lower I ran 500 rounds through it just to make sure everything was going to work right. I even did the unthinkable and ran brass cased ammo after running steel cased ammo with no issues. After a couple mags worth just to sight in the irons, scope, and red dot sights, it was torture time. 120 rounds of Wolf Military Classic shot as fast as I could pull the trigger and change mags. Took a little breather to load up 4 mags of Fed bulk from stripper clips and went at it again as fast as I could pull the trigger and change mags. Things got hot, real hot, but it never missed a beat. To finish the day, after letting things cool off, I ran 50 rounds of some reloads I picked up when I got my first AR. Those 50 rounds ended up in a requet ball sized hole in the target at 50 yards, wasn’t shooting really slow, even though I had the rifle rested on a bag under the floater tube. Now that the whole rifle is put together I’ll try for some accuracy next time I have it out. Not sure how much accuracy I’ll squeeze out of my cheap ammo though, may have to invest in some good stuff just for grins.

BCM Gunfighter Mod 4: Much mo bettah than the stock charging handle which is all I’ve ever used before. It never pinched me, despite all the warnings out there about it liking to bite. Easy to hit with the blade of your support hand, feels like a really solid piece compared to a stock CH. I’m going to have to get another one for my other AR now that I’ve used this one.

PWS FSC 556: I’ve used the stock birdcage flash hider, and a comp that a buddy made, and was really suprised how much the FSC calmed things down. Cross hairs stayed on target making for minimal correction between shots, very nice. Blast to the sides doesn’t seem too bad, at least to me behind the trigger, didn’t really notice any increased volume either. The folks beside me were singing a little different tune though. At one point he said I moved his spotting scope while shooting fast. He said it wasn’t really objectionable, but he would pause his shooting since it was a bit distracting.

Stark Grip: I’ve posted on several board around the web about how much I like this grip, but will include it here so everything is in one place. I have much more experience with pistols than I do rifles, with that in mind I just couldn’t get comfortable with the normal AR pistol grips. They set my wrist at an odd angle, trigger finger felt cocked downwards to work the trigger instead of inline with the bore, and they are way too small, landing my trigger finger at the knuckle insted of the pad of the finger. I swapped from the stock A2 grip to an Ergo and thought I’d just have to get used to it. When I saw the Stark I ordered one immediatly and am glad I did. The change in angle, length of trigger pull, and size fits me perfectly. I can now sink the grip down into my hand so the tang is in the web of my thumb just like a pistol, and no more repositioning my trigger finger as it lands on the trigger just right. I could give a damn less what it looks like, it works for me.

Phase 5 Tactical EBRv2: This one again reaches back to my background of shooting pistols, since I was used to actuating all the controls with my firing hand. When I saw the concept in Magpul’s videos I was destined to try it out. Since Magpul hadn’t released their BAD, I went with Phase 5 since they had theirs on the market, and it was a one piece design. I did have a problem with the first lever I recieved holding the bolt back after the last round fired, but a quick email to Phase 5 had a newer lighter version delivered to me at no cost, great customer service. When I installed the new lever I went out to the range and proceeded to perform 30 single round in the mag shots using a mix of 20 round P-mags, 30 round P-mags, and some no name aluminum mags I got from CMMG. Not a single failure to lock the bolt to the rear with this new version. Since that initial testing I have yet to have an issue with the EBR lever, it works perfectly. Good enough that I purchased another one for this build. I’ve also spent some time on the phone with Ken who runs Phase 5 and can tell from our conversation that he is dedicated to producing a quality product and has some in depth knowlege of the workings of the AR platform, and touched on some things I had never considered or read about.

Troy TRX-Extreme rail: I shared my two concerns in the write up previously, but after using it for a bit, those concerns are unfounded, or at least easily forgotten. The rail height is a non issue, and in reality almost impossible for them to get 100% due to variances in tolerances between manufacturers. The indexing tab really hasn’t been an issue since the rail locks up rock solid. It is light, strong, nice and thin, light, good grip, and did I mention light? The only drawback at this point is available sling mounts, hopefully Magpul will release their RSA pretty quick as this will be a perfect solution for me. Currently I’m using a chunk of the included rail and an MI HK hook sling mount. Sure it works, but I don’t like having to add a rail section just to mount a sling so it’ll get changed out in the future.

Troy Battle Sights: What can I say, Troy has a reputation for having the best folding sights on the market for a reason, they are that good. I’m really pleased with the HK style front sight so far, quick sight alignment for close up shots using the circle in a circle sight picture. Since I had to raise the FSP 2 clicks when I sighted in at 50 yards, using the circle in a circle sight picture is not going to be a tack driver, but that’s not what it’s for. Having the alignment off a touch does help with the close up snap shots it is for.

Milett DMS-1 1x4 scope: I’ve had this for a couple years now and it has performed without issue. I do wish the illumination was brighter, but that’s not really a big deal. It’s a bit heavy, but any 1x4 is not going to be light. Overall, I like it, but may try a different scope in the future.

Bobro extended scope mount: This thing is pure machining artwork. Super easy to use, very close tolerances, and has some design features not available anywhere else on the market. I’ll be using Bobro mounts from here on out.

Magpul UBR stock: Much has been written in the last 6 months or so about stock selection and how it relates to rifle balance. I went from a generic 6 position stock, to an ACE ARFX stock, to the UBR. While it is heavy, for me it puts this weight in a good position and has made a difference in how the gun drives from target to target. Much like the weight on the end of a conductors batton makes the tip seem to float as it moves, the heavier stock makes the muzzle feel light as a feather as you transition from target to target. The UBR is rock solid, and has a fantastic cheek weld for nose to the charging handle shooting, no complaints. I may be getting an ACS for my other AR though just to have a comparison.

Redi-mag: I tried a couple mag couplers, and had a fair ammount of success with them, enough so that I was sold on having a spare mag on the rifle. The next logical step was the Redi-mag. I chose the Redi-mag over the Redi-mod based solely on price, and don’t regret it, I work with metal on a regular basis, so I’ll lighten it myself when I get the time and motivation. I know the Redi-mod uses modified internal parts as well, but so far I haven’t had a problem with the stock stuff. I did straighten the mag release lever to make it easier to hit in a hurry, but that’s personal preference.

Think that about covers it for now, updates to follow when I get to the range again and get to try out the new lower and all the trigger work.

Very nice!

I dont have the Troy sights, but MI HK type.

Round sight alignment is quick for me!

Thanks.

I put an MI HK style front sight on my other AR since it has a railed gas block. It’s a quality piece, just haven’t had the chance to take it out to sight it in yet. Good stuff.

I am curious as to what Lower Parts Kit you used for all your mods?

LPK is just a run of the mill $55 DPMS set.

I did a bunch of looking around online before ordering, lots of folks saying DPMS LPK’s are junk, but no one had any reason other than that’s what they heard somewhere. The only real complaints I could find were the roll pins being difficult to install and sometimes a gritty trigger feel. Neither of those points were a concern for me.

Here’s where I get a bit long winded talking about triggers, the AR15 online community, and whatever slightly related topics I can come up with. Maybe it will help someone, maybe someone can tell me I’m full of crap, we’ll have to see.

Roll pins being difficult to install on DPMS LPK’s. I’m of the firm belief that this comes directly from the AR15 online community and a lack of experience with mechanical things. If you read through a bunch of forums, you’ll find that a large percent of people getting into AR’s and putting them together have to go out and buy a hammer, punches, pliers, etc just for the task. Not to put too fine a point on it, but if someone doesn’t already have a basic set of tools in the garage, closet, etc, they to me their mechanical aptitude is highly suspect in the first place, and I’m not going to put too much stock in their observations on how difficult something is to put together. Some people just aren’t mechanical, that’s fine, but that information has to be taken into account when basing decisions upon their information. Myself, I was helping dad in the garage replacing valves in an engine when I was 6, I grew up with tools and working with my hands. I have a garage full of tools and a decent metal fabrication shop. I’ve installed countless roll pins in different projects and found the DPMS pins to be no harder or easier than any other roll pin I’ve ever installed.

Polishing triggers etc. The popular stance of the AR forums I visit is that the trigger parts are surface hardened and shouldn’t be messed with except by a professional. It’s too difficult, too easy to mess up, you’ll turn it into a doubling rifle that will land you in federal pound me in the ass prison and they will shoot your dog.

Couple points there that are contradictory, mainly being “surface hardened, you’ll polish through it so the trigger will wear out”, and “send it to a professional”. Does the professional somehow bend the laws of physics and won’t polish through this surface hardening that precludes you from doing the work yourself? Nope.

Hardening metal involves heating and cooling cycles. Not heat from a bic lighter, but a lot of heat, like furnace heat getting the metal over 1000 degrees. If you look at a trigger right out of the package, notice the coating making it that nice black color, then notice that the sear surface is nice and shiney, usually with machining or grinding marks in it. Those nice shiney spots mean the surface was ground or machined after the trigger was coated, and the coating was applied after the parts cooled the final time. Understanging this will tell you that the surface was machined after any hardening was done. While it may not have removed to total depth of hardening, it has removed a majority of it, so polishing a sear surface is not going to hurt anything. To back this up, having turned literally tons of metal into dust through cutting, grinding, and polishing while working as a fabricator, cutting and grinding on a trigger feels like any other metal. Trust me, after spending the last 15 years working in metal fab shops, you get a feel for different metals and their properties.

But working on triggers is like a black art to most folks, the angles have to be precise or the rifle will malfunction, so it’s scary. Sure enough, if you start changing angles funky stuff can happen, that’s why my pictures and polishing doesn’t show any changing of the geometry, I’m just not willing to start experimenting with that portion of it. What I do show is merly smoothing the surface of the trigger to remove machining and grinding marks to reduce friction so the trigger pull is smoother. Go slow, make sure that on each draw of the trigger across the polishing medium that it is flat. Use careful deliberate strokes, don’t try to rush anything. The results will be worth it.

Finally, to bring this to a close, we have to understand that aultho there are many brands of AR parts out there, there are only a few who actually manufacture the pieces. For example, there are probably a hundred different brands of lowers out there, but there are only a handful of places making the rough forgings for these lowers who send them off to get the final machining done and rollmarks applied. Same goes for triggers. Brand X will get a drum full of triggers from the manufacturer who made them, then they will do the final machining, packaging, and sell them. What this means is that the basic material is the same for brand X and brand Y. They may use different roll pins, or use a finer finish on their machining, but that’s about it. Address those items and it doesn’t matter what you start out with.

Note I’m addressing standard single stage GI type triggers here, drop in trigger sets, or two stage triggers are completely different animals and something I have no experience with first hand, so I won’t comment on them.

Probably way more than you wanted when you asked what type of LPK I used, but maybe this will help folks, who knows.

I agree with alot of what you had to say. I spent a good deal of my adult life behind the Gun Counter selling Firearms, Hunting Gear etc…
I have seen this same mentality myself.

I spent a great deal of time with my Father working on cars, appliances etc…and have always had a deep appreciation for not just tools…but the right tool for the job.

You didn’t tell me more than I wanted to know about LPK’s…In fact I enjoyed your rant…:smiley:

Thanks Rat. It’s good to occasionally get some verification that I’m not too far off in left field.:stuck_out_tongue:

WOW! A lot of great info to consider when and if I do another build. :wink: