ordered mine on the phone today. looks like what i’ve been wanting. thanks heavyduty for the idea.
Nope, not my idea - I was just the Guinea pig!
Installed without a hitch using HeavyDuty’s tutorial - thank you for taking the time.
Thanks to Earl at IWC for the speedy service. I am looking forward to taking the mount out for a test run.
Understatement of the month.
Took me a bit to figure out what you meant about this, but I finally got it.
Ad the end of the day I managed to do it!
I may have missed it but with regard to the moe’s which are the correct set screws–the longer flat ones or the shorter pointy ones?
Thanks for ordering!
If you are mounting the QD MICRO near the barrel nut and the taper area of the barrel, then use the small pointy ones, as they’ll sit beneath the inside surface of the flange and allow clearance for the heat shields to clear the MICRO and barrel.
If you are not mounting it near the barrel nut, then either ones work fine. The pointy ones have no possibility of scratching the heat shields. Check your set-up for clearance and then proceed.
MOUNT-N-SLOT
Got mine in today and installed right away. I opted to use an epoxy in addition to the set screws to keep it secure…had some on hand, figured it would offer additional protection to keep it from rotating.
Digging it so far…
Some thing that might be helpful on installs where a hole will have to be drilled would be a plate that matches the dimensions of the backing plate but without the barrel. This could be stuck to the inside of a handguard to check for clearanses when reassembled. Otherwise there is no way to mock it up without drilling the hole.
Thanks for the comment. But clearance is a non-issue. The QD MICRO MOUNT-N-SLOT installs on a MOE Carbine, the most linear compact of the series, without issue.
This is a complex, multi set-up CNC components. Retails for $15.95. We just added a hex key, like all of our other products which is Made in the USA by Elkind, which further erodes our already slim margin.
I apologize. We can’t add another milled to size component to act as a template.
We are working on a SolidWorks designed PRINTED DRILL TEMPLATE (paper) to send with the mount. We can afford this.
MOUNT-N-SLOT
i got mine and installed it following heavy’s tutorial. worked out great. i really like this set up. i followed the instructions on which set screws(long) to use . yes, they will scratch up the black paint if you use the long ones. i’m not changeing them out. it’s a non issue to me, it’s installed, i’m happy.
thanks earl and heavyduty.
eldogg
Great looking product. I was going to do a lightweight build with MOE furniture throughout, but was driven away from the idea because there were no options for sling attachments that I liked. This would have done the trick.
I wasn’t suggesting it be included, just an extra option for sale. and it wouldn’t have to be made of metal, it could be plastic, chipboard, whatever. I’m going to make one out of chipboard for myself I think.
Rob_S.
If you have a better solution, like a chipboard spacer to use during mock-up pre-installation, which would help M4C members and others install Impact Weapons Components or any other mfg’s. kit for that matter, make it and post it so we all can benefit.
Thanks for helping out.
EARL
Thanks, once I looked at it closer I think either would work.
So speaking of hex key’s; what size is it that fits the screw? This is where I got hung up on the installation last night as I couldn’t find a small enough one to fit.
Agreed but no where near as hard as trying to cut down an MVG with a dremel. I almost went out and bought a damn table saw after that experience.
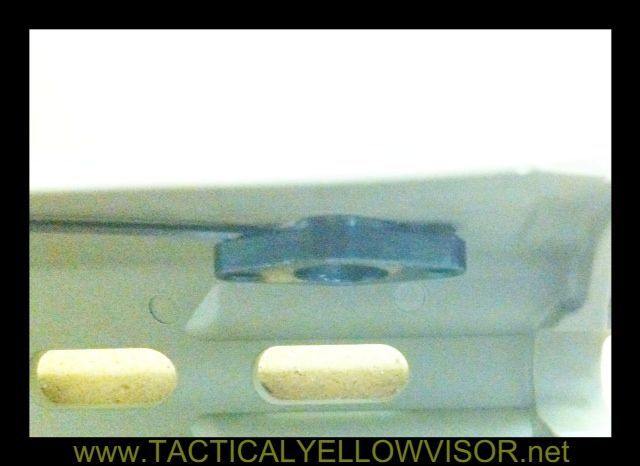
Is this normal? That’s a 0.050" hex key used as a stand-in feeler gauge.
2mm if I recall.
What groove do you have the ring in Rob?
Inner.
Got this same result with mid-length and rifle-length tan MOE. will post pics of installs when they finish uploading from my phone.
Here’s the one I just did on a carbine moe. I have it on the inner ring as well but ended up with half the gap you did Rob. This is the latest version moe if that makes a difference.

Are those gaps all the way around for both of you or just at the bottom? When I was figuring out where to drill it seemed like that area wasn’t perfectly flat and curved in toward the top. Seemed like if you either drilled the hole crooked or mounted it with the set screws perpendicular to the slots vs parallel as Quiet-Matt did it could be problematic. ![]()
EDIT:
Thanks, I’m off to Lowes since apparently some of my hex keys have legs. I’ll report back once I get the install finished. I could hold the mount flat against the inside with my fingers and it looked ok but I haven’t installed the ring yet so I’m not sure if it will be flush when its just sitting there or have a gap like what you guys are seeing.