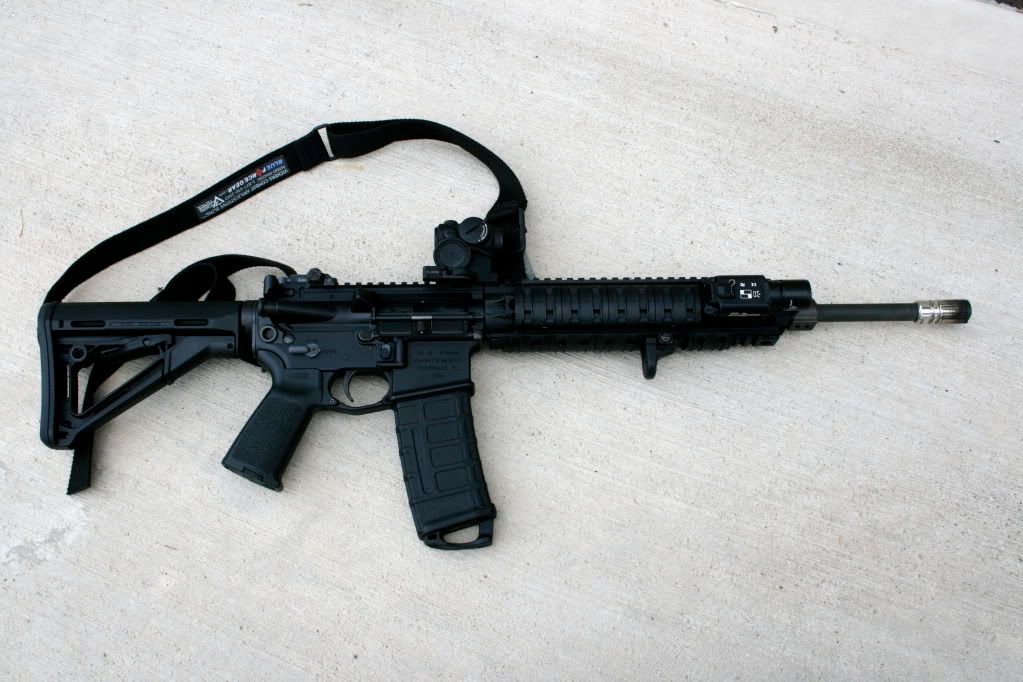
Stag model 2
DD Omega Rail 7.0
Tango Down FVG
DD FA BCG
Surefire X300
Aimpoint ML3 w/ Larue mount
Vickers 2 point sling.
Thanks for all your suggestions in my quest!


Stag model 2
DD Omega Rail 7.0
Tango Down FVG
DD FA BCG
Surefire X300
Aimpoint ML3 w/ Larue mount
Vickers 2 point sling.
Thanks for all your suggestions in my quest!
Aimpoint looks like its sitting a bit crooked in your mount there. Make sure you square it up as much as you can before you go to sight it in. Will make it much easier. Nice build though.
Looks like the Larue mount is backwards as well…
how do you zero the RDS like that?
This is a good chance to help mentor asharris7. I know that the M4C members will step up to the plate.

asharris,
As stated already, your aimpoint is not sitting correctly in the mount. The battery compartment needs to be at 1 o’clock, if I’m not mistaken. And the elevation adjustment knob needs to be at 12 o’clock definitely, with windage at approx 3 o’clock.
If you do NOT properly situate your aimpoint, you will NEVER be able to properly zero your rifle. If you leave it as is, your red dot will move diagonal when you are making your windage and elevation adjustments, instead of moving perfectly horizontal and vertical as they should.
The LT mount is technically backwards, but if that’s how you like it that’s fine. It can really go either way. A lot of guys reverse their LT T-1 mounts in order to get the 3X magnifier closer to the optic.
You might also want to slide your optic forward a bit, just to ensure your rear flip up BUIS can flip up all the way without the aimpoint being in the way… but it might just be me and my eyes here, and your rear BUIS might already be able to flip all the way up.
I would also move you SF X300 light (outstanding light choice BTW! I have a couple of them myself) to either the 9 o’clock or 3 o’clock rail and move your vert grip further forward in order to have more control over your muzzle when running the gun hard and shifting to multiple targets, also to help control recoil and have overall better control of the rifle. I personally have my X300’s mounted on the 3 o’clock rail b/c of how I grip my handguard, and use my middle or ring finger under the rail to activate the X300… it works great for me, but YMMV.
Just some suggestions, mate. These are all of the things I’ve personally learned over the past 8 or so months here, and they all really helped me out during my first carbine class 2 weekends ago.
Make sure you put some good rail covers on there too, man, because these bitches get HOT:eek: when firing at a sustained rate of fire for several mags! I recommend Magpul XTMs, but that’s just me and lots of guys run different rail covers. It’s all personal preference.
All in all, nice blaster! Go out and have some fun with it. Shoot the shit out of that thing!
Here’s my SR-15 rifle setup. I hope you don’t mind me posting these pics in your thread, I just wanted to give you an example of what (REALLY) worked out great for me in my first class. Only difference is I used a Single-point sling instead of the two-point, as that is just what worked out better for me due to physical limitations:


Thanks for the mentoring, RetreatHell - and nice carbine!
Thanks for the help! I remounted the ML3 just like you said, flipped it around, placed it properly in the mount (rotation wise) and moved it forward a tad. I also put the rubber cover on the ML3. As far as ladders are concerned, can I just use the ones that the DD rail came with?
Thanks for taking all the comments as constructive criticism - some guys would get butt hurt in your shoes but you are getting good advice and are heeding it. That says a lot about you; you are here to learn and there is a lot to offer.
I am a big fan of the standard ladder rail covers.
Thank you Sir! I am here to learn and this site is great! I Do not any have any experience with optics because when I was in the U.S. Coast Guard, all we used were irons. Looking forward to learning lots more here!
Very nice rifle aharris7. Definitely let us know how it shoots once you’ve had a chance to go shoot/zero it.
As to your question about running the ladders the DD rail came with. I recently purchased a DDM4 which came with ladders. It was doable for a few rounds but after anything more than a couple could become uncomfortable. YMMV To be honest I was wearing gloves and took them off just to see how hot it would get. With gloves and the ladders it would get warm if you just flat out dumped a couple of mags but it wasn’t unbearable. However, once I went to the Magup XTM panels I can’t see looking back. With gloves there is hardly any heat at all and its doable easily without gloves. If ladders work for you then do it. If you look for something else obviously there are plenty of options from Magpul, Tango Down etc.
<Jealous> and that’s an OK rifle you have there RetreatHell. </Jealous> :D. Super nice man. I want.
If someone has a better suggestion I’d love to hear it, but the way I oriented my aimpoint in the rings was to vice the rifle and set a level on the rail mount (crossways like wings) and tweak the rifle until it was level from side to side rotation and then put the Aimpoint in the rings and rest a level across the sight adjustment turret (caps off) and tweak the Aimpoint until the top of the “up” turret was level and then tighten screws with level in place until all screws (alternating of course:p) were tight. If there is a better way would love to hear:D
That’s basically how I leveled my Aimpoints.
I set the weapon in my maintenance stand, place one bubble level (see pic below) on the upper receiver between rail positions just aft of the Aimpoint, and level the weapon.
These tiny bubble levels are machined flat on the bottom.
The second bubble level goes on top of the Aimpoints upper turret after the cap has been removed.
With the mount screws just snug enough to hold the optic still, the Aimpoint is slowly rotated to bring the bubble level into center. The mount screws are then tightened.

This thread would never has gone this way(as in helpful and not condescending) at TOS. Way to go everyone.
Interesting information.
How are they machined? I would assume that this would not be done with a dremel.
No Dremel used, they were manufactured this way, with a small flat machined into the bottom of the housing.
I’m not sure where these levels came from or what they were intended for. I found them mixed in with some other small precision tools from my deceased Grandfather (He was a Mechanical Engineer).
When I saw them, I knew right away that they would be perfect for leveling optics!
We aim to please.

Here’s a shot of the reverse, showing the flats.

Some of us tried our best to keep things professional, and keep the threads from going in that (condescending) direction.
Well, the better part of the membership stepped up. Good job, fellows!!! And best of luck, OP! Glad you are here!
dog